Whilst perusing Pinterest I came across some attractive watercolours which were the result of a negative painting method. Keen to have a go a I watched a you-tube video and then set to with a simple flower motif.
The painting starts with a very wet sheet on which you dab the streaks of colour. The advice on you-tube was to make sure the paper was completely dry before continuing so I prepared this sheet the night before.
The next step was to draw in the first of the flowers which in the finished painting will be the palest flowers. The background is then going to be darkened; I decided to strengthen the existing colours but this doesn't have to be the case. Again the paper has to be dry before continuing so I went for a walk with the girls; this method can't be rushed in the early stages.
I really doubted how this would turn out so omitted to take any photos of the next stages which were to add more flowers and continue to darken the background. I worked this stage 4 times in total and then decided I needed to consolidate the background. I had veered away from the you-tube advice by now and in a bid not to turn the background to mud I applied a thin glaze of blue.
Instantly the colours on the flowers stood out but due to all the washes their outlines weren't very distinct. This was remedied with a black biro outline and then I continued to add a couple more flower shapes and some leaves. I knew I would be applying another background layer and to make this final layer neat I needed to break up the background. As this was an experiment I added double lines which would create a break in the final background colour.
The final glaze was a thicker wash of dark green which brought out the paler shades of the flowers. Although the lines were a device to break up the background I like the effect of the previous layers showing through them. I added a blob of colour to the middle of all the flowers but decided against tinkering with the petals and risk spoiling the clean colours.
So that's the method and now I've tried it I'll certainly give it another go.
I also have a tip if you order your library books online - check the print size; it might not be obvious they are in large print until you go to pick them up!
Monday, 29 April 2019
Saturday, 27 April 2019
Bits and Bobs
Most sewing time has been taken up recently by the Big Quilt, which is currently about 18% quilted. Here is the back of it, folded in half and taking up most of the living room floor.

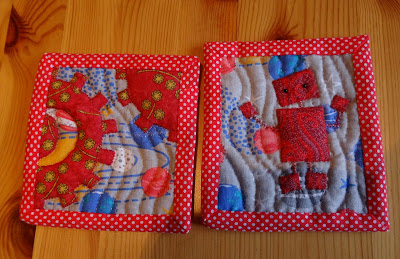
I'm already planning the next quilt, which will have a steampunk, cogs and gears theme, and possibly a robot or two. These two experiments have been made into coasters.
Here is the garden at Chester, taken with the camera in watercolour mode, which gives a lovely flowing effect. That may be Kev's knee and Bess's bum on the right!
And here are some of the frogs, enjoying the Easter sunshine.
Subscribe to:
Comments (Atom)


