Saturday, 4 December 2021
Sketchbook to stitch
Saturday, 20 November 2021
Hare and Hounds
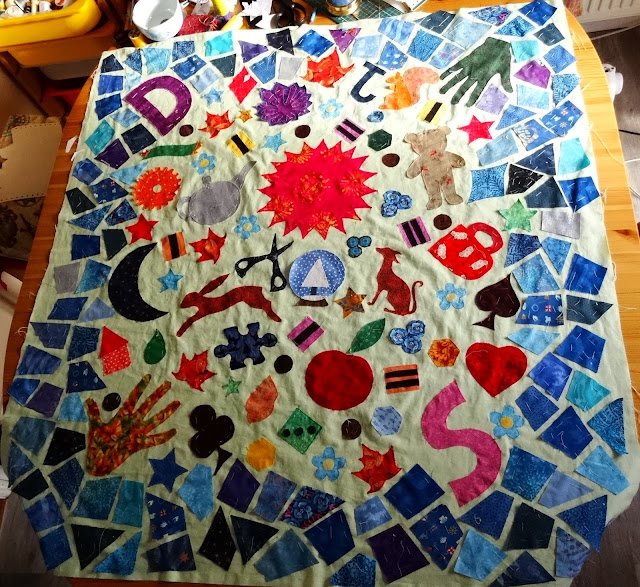
Our first job was to choose some base fabric - we decided on a plain light green cotton. By Friday dinnertime we had our first few motifs. At this point the sun was a circle and our birthstones were chunks of coloured material. We decided topaz could be blue, as I didn't want a chunk of yellow!
Friday, 1 October 2021
How small is a scrap?
Like a true squirrel, I'm reluctant to throw anything out, especially if it is the last little bit of a favourite material. Some of my scraps are less than an inch square, and they are all lovingly popped into whatever container is nearest and sorted through every so often for later use. They are useful for trying out new techniques, which, of course, creates a new, worked-on scrap, which goes back in the basket in a never-ending circle of reuse.
Every so often, I sew some of the experiments into pots, which have the advantage of being usefulA lucky find at the bottom of the scrap box means that the squirrel on the woodland quilt finally has a tail; I think it was a bit of an old chenille scarf. Two frogs on that quilt are still waiting for their eyeballs - a dig in the sequin box should hopefully sort that out... eventually.
Saturday, 18 September 2021
Garden visitors
 |
| Here is the rogue sunflower in all it's glory - not bad for a bit of bird seed that fell down the crack in the paving stones! |
Wednesday, 21 July 2021
A surprise visitor
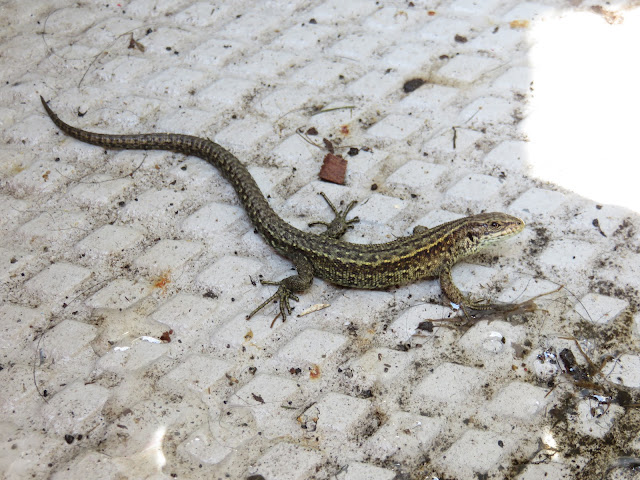
This little lizard came throught the drainage hole onto our front deck when we were moored up near Rawcliffe Bridge.
It was about 6 inches long and when it settled on a piece of rug I carried it out onto the bank.
Friday, 9 July 2021
Butterflies
I've finished the June bookmark and it proved quite tricky to take a photo showing the correct colours. This is the nearest I could get but all the colours are stronger than in the picture.
I've started sorting out my materials for the July bookmark which has a seaside theme.
Wednesday, 30 June 2021
A Little Bird
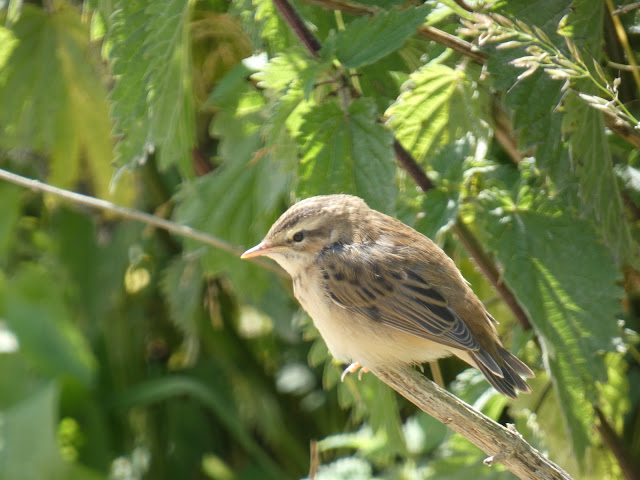
On my walk I came across a little bird who was happy to pose for the camera. As it has a white stripe over its eye I think it was a Sedge Warbler.
I also spotted a Comma butterfly and, although it was further back, I managed to get a photo as it paused on top of the undergrowth.
Sunday, 20 June 2021
If you go down to the woods today
Tuesday, 15 June 2021
Rare Sights
A beautiful little bee orchid surprised us all by popping up in amongst the long grass next to boat on stands.
Another sight which is probably not so rare is a cygnet hitching a lift on its Mum's back.
Sunday, 16 May 2021
May Bookmark
The May bookmark was based on a maypole but that does seem to have disappeared during the design process!
The top of the design on the bookmark is based on an aerial view of a maypole with the yellow circle representing the maypole and and the 12 blue lines which form a flower shape are the ribbons. To simplify the pattern I removed some of the ribbons at this point and then crossed over the ribbons to represent the pattern twisted round the maypole.
I then decided it needed some more interest as the pattern progressed and as it now resembled Celtic Knotwork I added some Celtic Knot style flowers and reduced the number of ribbons on the way.
I was pleased with the way the couching worked round the curves and I also used it for the lettering.
I've also had a try out of using invisible thread to couch metallic thread and am looking forward to incorporating that in a future piece.
Sunday, 2 May 2021
Drawing Lines (and keeping them straight)
Before any writing can be done, the page has to be prepared. The design is called the 'mise-en-page', and it turns out that there are many difficult and complicated ways of doing it. After messing about with harmonious rectangles for some time, I decided that, given the small size of my bifolia (150mm x 200mm), I would need to maximise the text area or it would be too small to contain any writing. I have attempted to apply the 'Recipe of Saint Remi', which lays out a set of proportions for the parts of the page. The upper margin is ⅔ the width of the lower and outer margins, and the inner margin is ⅔ that of the upper. I decided that most pages would have lines ruled straight across, but I've added four pages with columns, where the gap between columns (intercolumn) is the same width as the inner margin.
Once I had decided on my layout, the next job is to prick guide dots down the edges of the pages.
I used an awl for pricking, and tried pricking at the outer edges, using a ruler to keep the pricks in a
straight line. After pricking, the holes were ruled with a blind tool (a blunt darning needle, in this case).
The resulting lines are clear enough to see on the front and the back of the page.
I also used in-text pricking and intercolumn pricking on some of the pages. These were ruled with
a pencil, which I found much easier.
Here are the four ruled bifolia of my finished quire, ready for text and decoration!
Saturday, 1 May 2021
April Easter Eggs
The April bookmark shows an array of Easter Eggs all stitched in various colours using blackwork stitching. The material is black aida fabric.
This was a fun design to stitch but now I have to get my thinking cap on for the Maypole idea for this month.
On a different note, here is my new bike complete with its basket which should be very useful. Bess couldn't resist getting in the picture!
Sunday, 25 April 2021
Pages and Pages
After preparing my 'parchment sheets', the next job was to make them into pages for the book. The batches of pages folded together are called quires, and these will be stacked together to form the book - eventually.
I began by folding my parchments, first into 2 (in folio).I folded again to give 4 leaves (so 8 pages, called in-quarto), and then folded again to give 8 leaves (so 16 pages - in-octavo).
I had a go at different ways of making the quires.
On the left, four pieces of parchment have been cut, folded and stacked inside each other to form the quire. This will be a quarternio made up of four bifolia. The second picture shows six pieces of parchment to form a quire - a senio.
Both these examples obey Gregory’s Rule, which states that a page on the hair side should always be opposite another page showing the hair side, and the same with the flesh side.
Here I have ’hooked in’ an extra leaf into the quire. The short edge of parchment is called a ‘stop’ to keep the extra leaf in place.
I tried some different methods of folding quarterniones. None of the edges have been cut yet.
Top left- two sheets placed with like sides facing and then folded into 4.
Top right - one sheet folded three times, to give a single sheet with 16 pages.
Bottom left - two sheets each folded into 4, and then one place inside the other.
Bottom right - four sheets each folded into 2 and then placed inside each other.
I added cords to keep my quires together.
This sheet has been folded in-octavio and remains in one piece. Here the text can be 'imposed' - written on the uncut sheet, very carefully so that none of the finished pages are upside down or in the wrong place. It will then be refolded and cut to produce the quire..

Finally, I have added signatures on the back of each quire to show the order they will be bound in. I’ve used Roman numerals and placed them in the centre of the lower margin.


